Thursday, January 24, 2013

Our Home Years ago


I have been wanting to share with you what our home looked like back in January of 2009.  

You'll see that I have done quite a bit of painting since then.

So here goes....


This was our living room.  When we bought this house from my mother we did an overhaul.  New floors were laid, the two rooms were opened up(there used to be a HUGE bar where the tall cabinet is that separated the two rooms), and everything was painted including the cabinets.  They were originally oak along with the armoire and coffee table.  

It was still pretty bare after doing the remodel, but you can see that we have kept most everything and just gave it all a new lease on life.


Red has been a color that I have loved for years, I even had the walls red in here and the kitchen before  this green.
But...it was a little too much for me.  Especially after the power went out and I saw just how dark it really was.
All of the furniture has been slipcovered...so much cheaper than buying all new!


Now for the kitchen.
When I picked out the flooring, the color choice stemmed from Mammaw's china cabinet.  Then I stained the table top and island counter the same color.  I really loved it...but shabby chic was calling my name.  
Louder and LOUDER!


 Mike and I built the island from the old bar we ripped out.  Can you believe this is only half of the cabinets that were used?  Now you can get a slight idea of just how HUGE that bar really was!


I still really think it was pretty, but you can see how I was beginning to lighten things up a bit.


The  little girls room....dark forest green was her name.  How I loved her and how the white beadboard contrasted off of her dark walls.


She's all pink now!  Bye Bye dark green...


I had a thing for toile and boy did I really use it everywhere!  I loved black too!


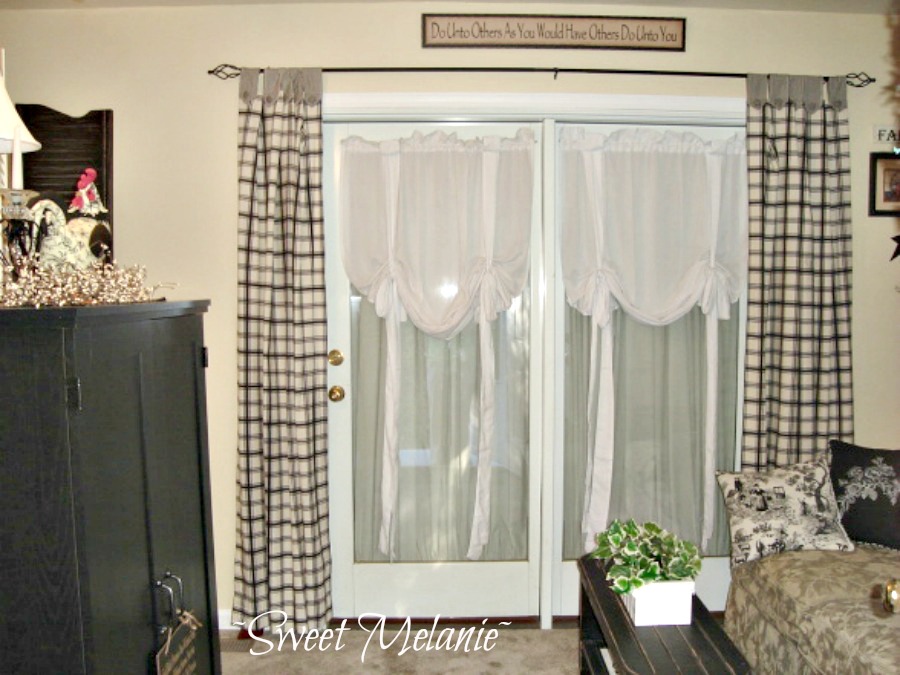
This is the back room for guests and where the girls play their wii and watch tv.
Mama now has that sign over the doors at her home..one of my favorite all time sayings!

There used to be a queen sized bed that took up almost every ounce of space and definitely was not needed!  Now I have so much more space to change around the furniture on either side of the room.


And this was our office area....it has really changed!


I love the British Rose that we have now.  Definitely glad the toile is gone!

So there ya have it...a few rooms and how they looked like what seems so long ago..  
Before we moved to the basement, these walls were a green like upstairs with the oak wood beadboard. The accent colors were peachy reds, golds and cream with light tan berber carpet.  It has really lightened up down here and can I say that it truly was needed to keep some sanity!

I Had a vision of what I wanted and slowly we've gotten there and now I LOVE IT!!

Wednesday, January 23, 2013

Lampshades can have slipcovers too


 It all started one evening when I saw this lovely lampshade.  I immediately went, pulled my sewing machine out, grabbed my white fabric and began to sew!
 Of course, I knew it wouldn't be exactly like this, but I loved how it just looked all crumpled.  Plus, Mammaw had a lamp similar to this.  So I guess that had me too!

I had bought a simple barrel shade before Christmas to replace one of my floral ones.  I wanted white, but they didn't have them so I had to settle for a taupe color.  Not my taste, but I knew I could make a slipcover for it.  I've done most all of my shades since they are so darn expensive when you go replacing all of them!


Here it is in a simple slipcover with a little ruffle on the top and bottom.

But I wanted to make the other one and thought, now what do I do with this one?  I can't stand to waste!


So I put it on this shade and added the lace and rose.  The lace can come off when I'm not in the mood for it and can go back to the previous one with ease.  I had made the rosette for the crumpled shade but thought it was just too much.

Now, for the other one...

Here she is!  I really like it and see how I added the lace to it too?  I have a friend on facebook to thank for that.  Her home is so beautiful!  She has lace, but it is done absolutely the right way...so I thought, what the heck...just do it!

Then I wanted to make something else.  Do you all do that once you start a project?  If I start painting, I can paint and paint and paint.  Same way with my sewing....


I just ripped strips of fabric, made into ruffles and added them to the slipcover.  I have to say that this one is my favorite!  I think I could have these little ruffles everywhere!


Mama bought me this little candle lamp for my birthday and the shade was ho-hum.  She said when I opened it that she knew I could slipcover it.   She knows that with any present that I get, is a true present when I can do a little sumpin'-sumpin' to it.

So I made yet another slipcover....can you see a pattern here with me and slipcovers?

So that's a "few" of my little slipcovers for our lampshades. 
Remember..before you go out and shop for that special lampshade....take a look at yours and think slipcovers!  Fabric is so much cheaper and you can find exactly what you are looking for.   Saves so much money and you can even use a hot glue gun if you can't sew a lick!  


Sunday, January 20, 2013

New Mantel


This was our kitchen at Christmas in 2011.  See, we have no mantel and did you notice that we do not have the same table and chairs?


We added the mantel over the summer and I have had so much fun decorating it for the holidays.  I loved the mirror and was completely happy until I said goodbye to Mike one morning as he went off to work.  I turned around to walk back inside from the garage and saw a buffet I had purchased a long time ago.  It  needed some work and I just hadn't felt like working on it until now!   As soon as I looked at it, it dawned on me on what I was going to do with it!


Here is the photo I saw online before I bought it.  I just knew she could really be beautiful once I got my hands on her!  I thought some paint and appliques would really make a difference.


Just look at the detail....oh how I fell in love with it!  See how the detail there on the bottom middle/left is missing?


This is what I was thinking...when I found this photo, I knew it was meant!

So I did a little bit of sweet talking to the Mister and he said we could do it....YAY!!!

Then I began to paint...


Oh how my heart flutters when I see my vision coming into view.  
I couldn't paint fast enough!


And here she is all finished!  See the piece that was missing?  Well, I had to replicate the piece to match the other side, so it's still drying.  That's why it looks so white.  Once it dries, I'll paint it and no one will know the difference.


Now I am one happy lady....it is perfect!

But wait....now what do I do with that huge mirror we took down?


Thursday, January 17, 2013


There is a party going on over at Debbiedoo's and Fox Hollow Cottage that I think you'll love seeing!
Lot's of creativity being shared...something I don't think anyone would want to miss!
       Fox Hollow Cottage                  Debbiedoo's                           

Click on the links above to check them out!


Sunday, January 13, 2013

Almost a Zero $ Makeover

Thought I'd share the utility room.  
After many shopping trips looking for cabinets, seeing the prices, I decided to figure out something else.
I even looked at Habitat, but never seen the right size or style that I was wanting.

The before will show just how much space was lost.


 All that wall space was being wasted and that cabinet just didn't look right in the corner.  Plus, do you notice those electrical outlets?  I hated them being so high and seen!


So...I came up with the idea of cutting the cabinet into two.  I know...GASP!
But I had had it for over 15 years and it just wasn't serving the purpose very well.
That's my ACDC loving husband getting ready to measure and taking the hinges off.


 And here it is.  Perfectly in two pieces.  Didn't Mike do a good job?!


He thinks so!


 And this is after we done A LOT or hard work to get them hung.  We had to make a base for one and a top for the other, jigsaw the bottom back for the electrical outlets(YAY), measure and find studs to mount them on and then my job was to start painting.  
Did you notice the window?
I finally got a huge window ledge for things.  I have my idea as to what I'm putting there...but you'll have to wait a little to see.


Now all the things you've seen so far didn't cost one cent until now.  I decided that I didn't want to use the existing doors since they were inset.  I thought it'd look too primitive.
So, off to Lowes I went.  Beadboard paneling, trim,  more paint and glass knobs were my purchases...along with two small baskets.  A total of $40....anyone could afford a remodel like this couldn't they?!
We made the doors and they couldn't have turned out any better in my book!


Then I began to sew.  I had a few pieces of the Cherry Blossom fabric left and some eyelet that was Mammaw's.  I know she's smiling down on me right now and proud that I am using her things.

I love the window!!!


And I had enough to make the little skirt under the table to hide the trash can!  Did I mention that this little table was a free junk item?  SCORE! 
We used some of it to make the top for one of the cabinets and this was left.  It fit perfectly!  It's perfect for storing one of my laundry baskets instead of on top of the dryer.
Lot's of painting went on in here...everything is white-white and I couldn't be any happier!

The baskets on the window  are for lost socks...I am tickled with this idea!  I always seem to have so many little lost ones when I am doing laundry.  Now they'll be in one spot for easy access!


And here she is...if any of you haven't figured out by now that I absolutely HATE doing laundry, well, you know now!
I am hoping that now, since my storage issues are addressed, that I will feel a little more at home doing that dreaded chore!


I even tackled these doors...they were in need of a good cleaning and some fresh paint.  The glass knobs were bought at Home Goods for $7. One of the knobs screw was broken and they had them marked down "as is"...I knew I could fix it!  So the closet doors got the extra two.

This cabinet was in the garage storing tools and junk a long, long time ago.  One day I had the bright idea of bringing it in here.  It's had many paint jobs, but this is my favorite. Perfect for folding laundry!


Hopefully you can see just how big the laundry room is.  The closet is the whole width of the room and stores the laundry baskets, towels and Mike's work clothes...along with the mop, broom and sweeper.  Lots of storage!
It is adjoined to the bathroom.  I love how the two flow together.  That was my Mama's design when she had this house built. 


WE have a lot of things that need air dried, so I have tried to create things to hang on.  The little cabinet opens up and folds out for bars that can have things to lay flat.  It was a super find for me years ago!


I had the rug stored away and thought about it last night.  It needed a little something on the floor, so I love it!
I made the chandy a few months ago, it works and looks perfect in the middle of the window now.  And I was able to store my ironing board beside the dryer.  I originally had it stored in the closet, but I iron a lot, so this is easier to pull out when needed.

So there ya have it...all finished and serving my needs very well!

Now I'm off to do some laundry....


Thursday, January 10, 2013

My Sweet Valentine


I am finally able to do a post after my sweet husband did some work to our computer.  I've been about to bust!

I just had to share some simple Valentine's decorations I've made and bought from Dollar Tree.

We'll start with the paper hearts on the back of the chairs.  Last year I made these from printing out some of my favorite floral designs on our printer and then adding them to lightweight card stock with glitter and ribbon.


Talk about simple but messy....I had glitter everywhere for days!  Each one is special just like our girls, so I added them to their chairs.


Here are some more that I made into garland.  Last year I hung them on the window hanging in between the kitchen and living room.  I just added this mantel over the summer, so I am having a ball with decorating it for each holiday...especially Valentine's Day!


I found some paper heart doilies at Dollar Tree the other night and bought the pink and white ones. I bought more than I could use, so Mama gets some!


Aren't they just so pretty with the lace mason jars and candlelight?


I added some to my Dollar Tree dishes too.  


They had these little glitter pink hearts on a red stick.  They're made of foam...I ripped them off and added them to the centerpiece.  Matched perfectly to the crystal garland.


I found this heart last year at Home Goods and thought it would take the place of the paper heart garland this year....Perfect!


I gathered up all of my china and went to town grouping them all together in Mammaw's china cabinet. I have had so much fun decorating for Valentine's day...can you believe that I never used to decorate for it?  


I recently bought some Royal Albert china at Home Goods and put the little saucers over my stove.  They came with these little cups.  I think they look cute with the rest of the dishes.


I'd love to find some more!


My Birthday present last year from Mama was the pink cake plate and tray.  She knows me so well doesn't she?!  All of the other china has been bought from thrift stores and some came from my Aunt Linda who passed away almost two years ago.   She had a fetish with dishes just like me!

Special memories are everywhere in my home filled with lots of 
~LOVE~


This little print is a free printable I found with the perfect shade of pink.  The desk and chair were Mammaw's and have been passed down from her to my Mama then to me.  I padded the little chair and covered with one of my favorite quilts.  The rooster lamp came from Cracker Barrel a long, long time ago.  Of course I painted it white and added the pink shade.


I recently went on a sewing string with making slipcovers for some of my lampshades...so I'll post about those later.  I'm leaving a snippet of what to look forward to.  

Be sure to come back for the Valentine's in the living room next week....Thanks for stopping in!.